Construction of a "Hydro" growing room in a professional way.
This tank system is currently not sold anymore because this photo report was made and put online with our first website in 1999!
However, the rest of the material is still used today. That's why I put it back online today.
The system we have chosen can be adapted with more or less lamps
according to your needs or the power of your electric meters?
This system is only suitable for hydroculture.
Choosing a correct and professional system will help you save time and money in the future.
The system we are going to show you is used with with medium size Rockwool slabs. (5 plants per tray)

The picture shows you the assembly of the slabs on the base (6 slabs per unit). One unit measures approximately 105cm X 90cm
and fits perfectly for a lamp, in this demonstration we will join 5 units together
and hang 7 lamps of 600 watt above them.
The room we have chosen measures 3m X 4m. The height of this room is 2.6m
The picture on the left shows you the location to place the drainage pipe.
The drain pipes will be attached directly to the pipe, the rockwool containers will be placed on the unit.
Demonstration pictures:
Image 1: See below, all units are connected by a T-piece
Image 2: See the closing of the last T
Image 3: The outlet of the drainage system
Image 4: The attached drainage and rockwool pans fitting into the base
Image 5: The T-piece and the drain pipes attached
Image 6: The complete unit with the rockwool trays
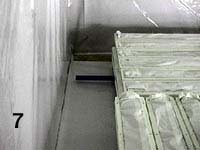
Image 7: Look at the drain pipe outlet, it will connect to your drain.
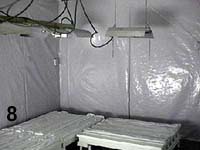
Image 8: Look at the reflectors fixed to the ceiling and mounted with son-T-plus 600 watt bulbs.
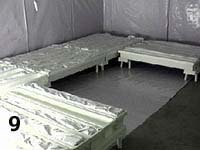
Image 9: The complete equipment ready and the reflective plastic placed on the wall.
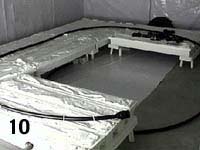
Image 10: We are ready to place the pipe of our irrigation system.
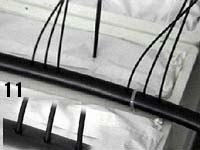
Image 11: Look at the irrigation capillaries are fixed in the main pipe
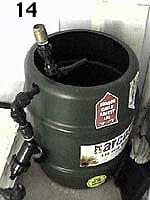
(We also have other types of material in store)
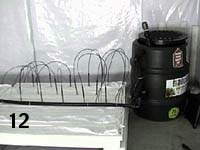
Image 12: The micro pipes are fixed and our main pipe will be connected to the tanker containing your water and nutrient reserves.
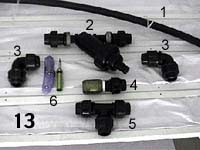
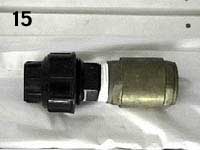
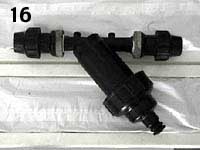
Image 13 to 16: You can see the different components of an irrigation system
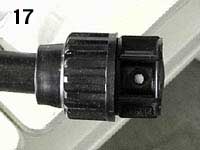
Image 17: This is the stopper, it is placed at the end of the main pipe.
Image 18: Look at the micro pipes are fixed in our start-blocks which are themselves placed on our rockwool slabs.
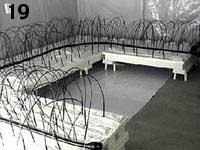
Image 19: You can see our hydroponic installation now finished.